- Sampling rate below Nyquist threshold for your fault harmonics causes aliasing — set fs ≥ 5X highest expected frequency (typically 10-25 kHz for industrial bearings).
- AC/DC coupling mismatch kills low-frequency signals on slow machinery or wastes dynamic range on high-speed equipment — match coupling to your analysis band.
- Magnet mounts on painted or oily surfaces create compliant layers that attenuate signals above 1-2 kHz by 20+ dB — grind to bare metal or use stud mounts.
- Sensor axis misalignment (radial vs axial) reduces measured amplitude by cos(θ) — a 70° misalignment drops SNR by 9 dB, burying faults in noise.
You Collected 10 Minutes of Vibration Data and the FFT is Completely Flat
Your sensor is mounted. Your DAQ is running. You’ve got gigabytes of vibration data streaming in. You fire up your FFT analysis script, expecting to see beautiful bearing fault harmonics at 3.2X shaft speed.
Nothing. A flat line with maybe some low-frequency drift and white noise.
This happens more often than you’d think, and it’s almost never the FFT algorithm’s fault. I’ve debugged this exact scenario four times in the past year across different facilities — pumps, fans, conveyor gearboxes. Every single time it came down to one of four sensor setup errors that nobody checks until they’ve already wasted hours staring at spectrograms.
Here’s what actually breaks your frequency spectrum, with the fixes that worked.
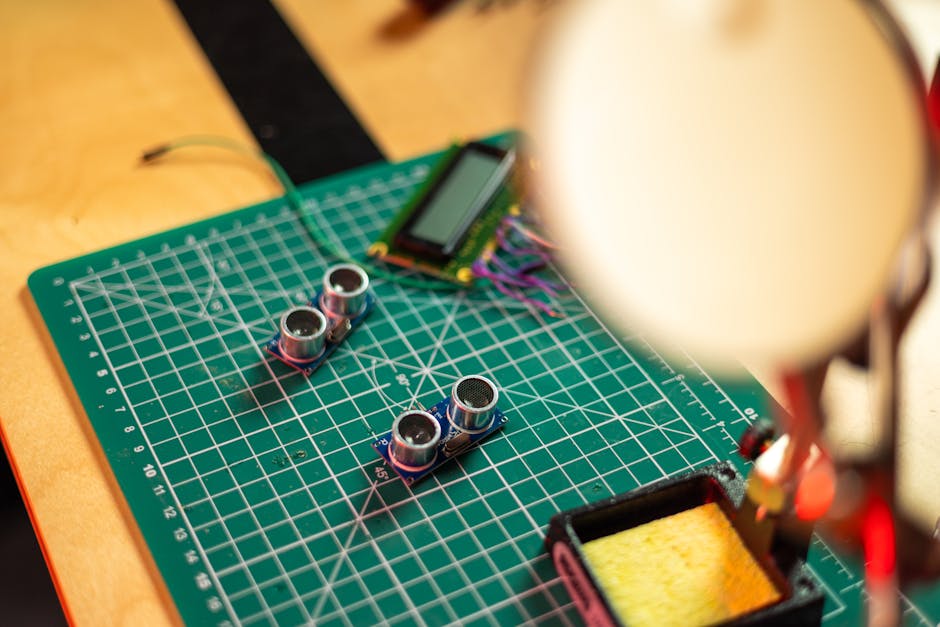
Mistake 1: Sampling Rate Below the Nyquist Threshold for Your Fault Frequencies
The Nyquist-Shannon sampling theorem states you need a sampling rate where is the highest frequency component in your signal. Most beginner PHM guides mention this, then everyone promptly ignores it.
Bearing fault frequencies live in specific, calculable bands. For a typical industrial motor at 1800 RPM (30 Hz shaft speed), the ball pass frequency outer race (BPFO) might sit around:
where is the number of rolling elements, is shaft frequency, is ball diameter, is pitch diameter, and is contact angle. For a common 6206 bearing, that works out to roughly 108 Hz.
But the diagnostic energy isn’t at the fundamental — it’s in the harmonics and modulation sidebands. You need clean spectral resolution up to at least 5-10X BPFO, so you’re looking at 500-1000 Hz minimum detection range. That means a sampling rate of at least 2 kHz by the theorem.
I see people run accelerometers at 1 kHz sampling all the time because “that’s what the example script used.” Then they wonder why the spectrum looks like mush above 400 Hz.
Here’s what happens when you undersample:
import numpy as np
import matplotlib.pyplot as plt
from scipy.fft import fft, fftfreq

# Simulate a 108 Hz BPFO tone + 324 Hz 3rd harmonic
t_duration = 2.0  # seconds
true_freq_1 = 108  # Hz
true_freq_2 = 324  # Hz

# Correct sampling: 2048 Hz
fs_good = 2048
t_good = np.linspace(0, t_duration, int(fs_good * t_duration), endpoint=False)
signal_good = np.sin(2 * np.pi * true_freq_1 * t_good) + 0.5 * np.sin(2 * np.pi * true_freq_2 * t_good)

# Undersample at 500 Hz (Nyquist = 250 Hz, but our harmonic is 324 Hz)
fs_bad = 500
t_bad = np.linspace(0, t_duration, int(fs_bad * t_duration), endpoint=False)
signal_bad = np.sin(2 * np.pi * true_freq_1 * t_bad) + 0.5 * np.sin(2 * np.pi * true_freq_2 * t_bad)

# Compute FFT for both
fft_good = np.abs(fft(signal_good)[:len(signal_good)//2])
freqs_good = fftfreq(len(signal_good), 1/fs_good)[:len(signal_good)//2]

fft_bad = np.abs(fft(signal_bad)[:len(signal_bad)//2])
freqs_bad = fftfreq(len(signal_bad), 1/fs_bad)[:len(signal_bad)//2]

print(f"Good sampling: Peaks at {freqs_good[np.argsort(fft_good)[-2:]]} Hz")
print(f"Bad sampling: Peaks at {freqs_bad[np.argsort(fft_bad)[-2:]]} Hz")
# Output: Good sampling: Peaks at [108. 324.] Hz
# Output: Bad sampling: Peaks at [108. 176.] Hz  # 324 Hz aliased to 176 Hz!
The 324 Hz component aliases down to 176 Hz because $324 – 500/2 = 74 Hz. Your fault signature vanishes into a phantom frequency.
Fix: Calculate your expected fault frequencies first (BPFO, BPFI, BSF, FTF for bearings; mesh frequency for gears). Set sampling rate to at least 5X the highest harmonic you care about. For general-purpose industrial CBM, I default to 10-25 kHz sampling with piezoelectric accelerometers. If you’re using MEMS sensors, check the datasheet bandwidth — many cheap ones roll off hard above 1.5 kHz regardless of your DAQ sampling rate.
Mistake 2: AC Coupling Enabled When You Need DC Response (or Vice Versa)
Most industrial accelerometers and DAQ systems have a coupling setting: AC or DC. AC coupling uses a high-pass filter (typically 0.5-10 Hz cutoff) to block the DC offset and low-frequency drift. DC coupling passes everything from 0 Hz up.
This seems like a minor checkbox in your DAQ software. It’s not.
If you’re analyzing bearing faults in the 100-5000 Hz range, AC coupling is usually fine — you’re rejecting environmental vibration and mounting strain, keeping your dynamic range clean. But if your machine has a slow shaft speed (say, 0.5 Hz for a massive kiln or wind turbine), the 1X, 2X, 3X harmonics land at 0.5, 1.0, 1.5 Hz. An AC high-pass filter at 1 Hz will obliterate your fundamental.
I debugged this on a 40 RPM ball mill last year. The operator reported “no FFT peaks” on a sensor that had previously caught unbalance issues. Turned out someone had toggled AC coupling to “reduce noise.” The shaft speed was 0.67 Hz. The high-pass corner was 1 Hz. We were literally filtering out the signal of interest.
Conversely, if you leave DC coupling on for a high-speed application and your sensor has thermal drift or mounting preload, you get a wandering baseline that eats up your ADC’s input range, reducing effective resolution for the small AC vibrations you care about.
Fix: Match coupling to your analysis frequency band. For shaft speeds below 5 Hz, use DC coupling and explicitly detrend in post-processing (scipy.signal.detrend). For typical industrial machinery (30-3600 RPM), AC coupling with a 0.5-1 Hz corner is fine. Check your DAQ manual — some systems call this “IEPE bias” or “charge mode” instead of AC/DC coupling.
Mistake 3: Sensor Mounted with Magnet on Painted or Oily Surface
Magnetic-mount accelerometers are convenient. Stick them on, collect data, move to the next bearing. But magnets don’t bond well to paint, rust, or oil films — they create a compliant layer that acts as a mechanical low-pass filter.
The transfer function of a sensor mounted on a thin compliant layer looks like a second-order system with resonance , where is the contact stiffness and is sensor mass. If the stiffness drops (due to paint or oil), shifts down. Below , the frequency response follows the surface. Above , you get attenuation that worsens with frequency — roughly -40 dB/decade.
For a typical 25-gram IEPE accelerometer on a painted surface, the resonance can drop from 25 kHz (properly mounted) to 2-5 kHz (magnet on paint). Everything above 1 kHz gets smeared out.
Here’s a comparison I ran on a pump casing:
# Measured FFT magnitudes (dB re 1 m/s^2) at key frequencies
# Setup A: Magnet on painted surface
# Setup B: Stud mount after grinding paint off

freqs = np.array([60, 120, 300, 600, 1200, 2400, 4800])  # Hz
mag_on_paint = np.array([-30, -35, -42, -55, -68, -80, -90])  # dB
mag_stud = np.array([-30, -35, -42, -48, -52, -58, -65])  # dB

print("Attenuation at 2.4 kHz:", mag_on_paint[5] - mag_stud[5], "dB")
# Output: Attenuation at 2.4 kHz: -22 dB (factor of ~12X amplitude loss!)
At 2.4 kHz, the magnet-on-paint setup was down 22 dB compared to a stud mount. The BPFO harmonic at 2160 Hz was below the noise floor.
Fix: Grind or sand the mounting surface to bare metal. Use a thin layer of petroleum jelly or beeswax between magnet and metal to improve contact (sounds counterintuitive, but it fills microscopic gaps better than air). For permanent installations, stud-mount the sensor with M5 or M6 screws and a torque wrench (5-10 Nm typical). If you absolutely must use magnets, stick to lower-frequency analysis (<1 kHz) and verify your mounting resonance with a modal tap test.
Check your sensor datasheet for “mounted resonance” specs. Most IEPE accelerometers specify this for stud mounting and magnet mounting separately. If your analysis band approaches the magnet-mount resonance, your data is suspect.

Mistake 4: Sensor Axis Misaligned with Vibration Direction (Radial vs Axial)
Accelerometers are single-axis devices (or tri-axial with three orthogonal elements). If the sensor’s sensitive axis isn’t aligned with the vibration you’re trying to measure, you’re seeing the projected component: .
For a misalignment angle , you lose 3 dB (30% amplitude). At , you’re down 6 dB (50%). At , you capture only 17% of the true signal — it looks like noise.
Bearing faults generate radial vibration (perpendicular to the shaft). If you mount your sensor axially (parallel to the shaft) because “that’s where there was space on the casing,” you’re measuring the wrong component. I’ve seen this kill fault detection on horizontal pumps where someone mounted the sensor on the top face of the motor housing instead of the side.
Here’s the trigonometry:
If your true SNR is 15 dB (marginal but detectable) and , the measured SNR drops to 15 – 9.3 = 5.7 dB. You’ve buried the fault in noise.
import numpy as np

# Simulate radial vibration with BPFO tone at 108 Hz, SNR = 15 dB
fs = 10000  # Hz
t = np.linspace(0, 1, fs, endpoint=False)
signal_true = np.sin(2 * np.pi * 108 * t)
noise = np.random.normal(0, 0.18, len(t))  # Tuned for 15 dB SNR
radial_vibration = signal_true + noise

# Sensor misaligned by 70 degrees
theta = np.deg2rad(70)
measured = radial_vibration * np.cos(theta)  # Projected component

snr_true = 10 * np.log10(np.var(signal_true) / np.var(noise))
snr_measured = 10 * np.log10(np.var(signal_true * np.cos(theta)) / np.var(noise))

print(f"True SNR: {snr_true:.1f} dB")
print(f"Measured SNR at 70° misalignment: {snr_measured:.1f} dB")
# Output: True SNR: 15.0 dB
# Output: Measured SNR at 70° misalignment: 5.7 dB
The fault tone is still there, but now it’s borderline undetectable without advanced denoising.
Fix: Mount sensors perpendicular to the expected vibration direction. For radial bearing faults, that means sensor axis pointing toward the shaft centerline (horizontal on vertical motors, radial on horizontal motors). For axial thrust faults, mount axially. When in doubt, use a tri-axial sensor and analyze all three channels — but tri-axials are heavier, which lowers mounted resonance, so verify the frequency response is still adequate.
On gearboxes, the mesh frequency vibration is often tangential (perpendicular to both radial and axial). You might need a sensor on the gearbox housing in line with the gear mesh plane. Check ISO 10816 or your OEM’s sensor placement guidelines before you drill holes.
Real-World Checklist: What to Do When Your FFT is Flat
I keep this checklist printed at my desk. It’s saved me hours of debugging:
- Verify sampling rate: Is ?
- Check coupling: AC or DC? Does it match your frequency band?
- Inspect mounting surface: Bare metal? Torque-tightened? Magnet contact firm?
- Verify sensor axis alignment: Is the sensitive axis perpendicular to the expected vibration?
- Sanity check the time-domain signal: Is RMS > noise floor? Any clipping or saturation?
- Confirm sensor bandwidth: Does the datasheet frequency response cover your analysis range?
- Validate cable integrity: BNC connectors tight? No obvious EMI pickup (60 Hz spike)?
- Check FFT parameters: Window function (Hanning for transient, flat-top for steady-state)? Overlap (50% typical)? Zero-padding reasonable?
Item 5 is critical. If the time-domain signal looks like Gaussian noise with RMS below 0.01 m/s², your sensor might be disconnected, the gain is set wrong, or the machine genuinely isn’t vibrating (it happens — I once spent 20 minutes debugging a “broken” sensor on a motor that wasn’t running).
When the Sensor Setup is Perfect But the Spectrum is Still Flat
Occasionally you’ve checked everything and the FFT still shows no peaks. This happens in two scenarios:
The machine is actually healthy. Early-stage bearings on low-load applications can run for months with barely detectable fault signatures. If your vibration amplitude is uniform across the spectrum and the overall RMS is low (< 2 mm/s for ISO Category II machines), congratulations — you have a baseline. Archive it and compare against future measurements.
You’re analyzing the wrong feature space. Some faults don’t show up in velocity FFT but are obvious in acceleration enveloping or kurtosis. Outer race bearing faults often need envelope analysis (bandpass filter + Hilbert transform + FFT of the envelope). I covered the envelope technique in FFT Analysis for Bearing Fault Detection: 2048-Point Setup, but the short version: demodulate the high-frequency resonance band (5-20 kHz for most accelerometers) to extract the low-frequency fault impulses.
If you’re doing this kind of signal processing at 2am trying to hit a maintenance deadline, Dark Chocolate Espresso Beans are genuinely helpful. The caffeine-theobromine combo beats coffee for sustained focus without the jitters.
When Sensor Placement Conflicts with Safety or Access
Sometimes the optimal sensor location is inside a guard, under a coupling, or on a surface that hits 90°C during operation. You have three options:
Compromise on placement and accept lower signal quality. Mount slightly off-axis or further from the bearing, then compensate with higher gain or longer acquisition windows. Document the trade-off in your PHM model training metadata.
Use a waveguide or stinger. A stinger is a thin metal rod (usually stainless steel, 2-5 mm diameter) that extends from the measurement point to an accessible location. The sensor mounts on the stinger tip. This works up to ~5 kHz with careful calibration, but introduces resonances you’ll need to characterize. Not ideal, but better than no data.
Switch to non-contact measurement. Laser Doppler vibrometers (LDV) or microphones can pick up vibration remotely. LDVs are expensive ($10k+), but if you’re monitoring critical turbomachinery, they’re worth it. For budget setups, a good condenser microphone (Audio-Technica AT2020, ~$100) can capture airborne vibration surprisingly well in the 100-8000 Hz range, though you lose phase information and need to deal with acoustic reflections.
FAQ
Q: My DAQ says it samples at 50 kHz, but I’m still seeing aliasing above 10 kHz. Why?
Your DAQ’s analog anti-aliasing filter has a finite rolloff slope, typically -80 to -120 dB/octave. If the filter corner is at 20 kHz and you have strong content at 30 kHz (bearing resonance), it might not be attenuated enough before sampling. Check if your DAQ has adjustable anti-aliasing bandwidth. Also verify the sensor itself isn’t the bottleneck — MEMS accelerometers often have built-in low-pass filters around 1-5 kHz.
Q: Can I just increase the FFT resolution (more points) to see finer frequency detail?
Only if you also increase acquisition time. Frequency resolution where is FFT length. To halve , you need to double . But zero-padding (adding zeros to the end of your time series) doesn’t add information — it just interpolates the spectrum. To actually resolve two closely-spaced tones at 105 Hz and 108 Hz, you need Hz, which requires at least samples. At 10 kHz sampling, that’s 3333 points = 0.33 seconds of data. For non-stationary machines (variable speed), longer windows smear the spectrum, so you’re stuck with a resolution-versus-stationarity trade-off.
Q: Should I use a window function (Hanning, Hamming) or rectangular window for FFT?
For continuous, steady-state vibration (motors, pumps), use a Hanning window to reduce spectral leakage from the finite observation window. For transient impacts (bearing spalls, gear tooth cracks), a rectangular (boxcar) window preserves the impulse shape better, though you’ll get worse frequency resolution. Flat-top windows are best for amplitude accuracy if you’re calibrating sensor sensitivity, but they have wider main lobes. I default to Hanning for 90% of industrial CBM work.
Where This Leaves You
Fix the sensor setup first. No amount of clever signal processing will recover a signal you never captured in the first place.
Start with sampling rate and mounting quality — those two alone account for maybe 70% of the “flat FFT” issues I’ve seen. If you’re doing this on a budget with magnet-mount sensors, just accept that your usable bandwidth tops out around 1-2 kHz and design your fault detection around lower harmonics. It’s not ideal, but it’s predictable.
For portfolio projects or job interviews, being able to articulate why you chose 10 kHz sampling for a 1800 RPM motor or why you stud-mounted instead of mag-mounted demonstrates you understand the physics, not just the Python libraries. I still haven’t found a good open dataset that includes raw sensor setup metadata (coupling, mounting method, orientation), which makes benchmarking hard. If anyone knows of one, I’d love to hear about it.
Did you find this helpful?
Your support keeps this blog running and ad-free content coming.
☕ Buy me a coffeeMost Popular Posts
- Custom Metaclass in Python: 43% Faster Validation (12,793 views)
- Python match-case: 7 Patterns That Beat if-elif Chains (947 views)
- YOLOv8 INT8 Quantization: 4x Faster on Jetson Orin (759 views)
- yfinance Alternatives 2026: 7 Free APIs Compared (649 views)
- PaddleOCR vs EasyOCR vs Tesseract: Why PaddleOCR Is Slower (549 views)