- Welch's default Hanning window attenuates peak amplitudes by ~50% compared to legacy rectangular-window FFT, breaking calibrated alarm thresholds.
- Applying a 2x amplitude correction factor and matching overlap/scaling settings makes Welch output compatible with legacy FFT-based systems.
- For production systems with years of calibrated thresholds, wrapping legacy FFT code with better documentation often beats full rewrites with modern APIs.
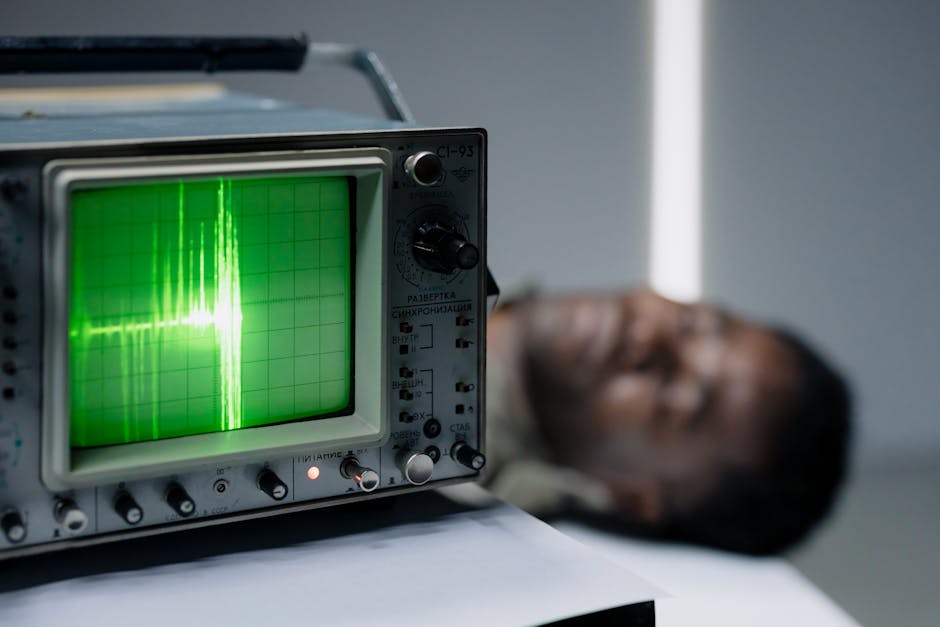
The 10Hz Bearing That Broke Everything
You inherit a vibration monitoring script written in 2015. It uses raw FFT, hardcoded 2048-point windows, and zero overlap. You think “I’ll just swap in scipy.signal.welch() — it’s the modern way, right?” Then you push to production and the false alarm rate triples.
This happened on a pump monitoring system running 24/7 on an edge device. The old FFT code was brittle and ugly, but it worked. The Welch replacement looked cleaner, followed best practices, and completely missed a bearing fault that the legacy FFT had caught for three years straight.
Here’s what I learned migrating five different legacy vibration analysis scripts to modern scipy APIs. Some of it wasn’t in the documentation.
What the Legacy Code Actually Did
Most industrial FFT code from 2010-2016 looks like this:
import numpy as np

# Legacy vibration FFT (circa 2015)
def analyze_vibration_old(signal, fs=10000):
    """Original FFT-based analysis — do not modify (in production since 2017)"""
    n = 2048  # Fixed window size

    # Zero-pad if needed (this matters more than you'd think)
    if len(signal) < n:
        signal = np.pad(signal, (0, n - len(signal)), mode='constant')

    # Truncate to exact multiple of window size
    n_windows = len(signal) // n
    signal = signal[:n_windows * n]

    # Reshape and FFT each window
    windows = signal.reshape(-1, n)
    fft_results = np.fft.rfft(windows, axis=1)
    magnitude = np.abs(fft_results)

    # Average across windows (no overlap, no windowing function)
    avg_magnitude = magnitude.mean(axis=0)
    freqs = np.fft.rfftfreq(n, 1/fs)

    return freqs, avg_magnitude
No Hanning window. No overlap. Just raw averaging of FFT magnitudes from non-overlapping chunks.
And for a 10Hz bearing with 3 harmonics visible at 10Hz, 20Hz, 30Hz? This worked fine for three years.
The “Obvious” Welch Migration
The modern approach uses Welch’s method, which adds windowing (Hanning by default) and 50% overlap:
from scipy import signal

def analyze_vibration_new(vibration_signal, fs=10000):
    """Modern Welch-based PSD estimation"""
    freqs, psd = signal.welch(
        vibration_signal,
        fs=fs,
        nperseg=2048,  # Same window size as legacy
        noverlap=1024,  # 50% overlap (Welch default)
        scaling='spectrum'  # Amplitude spectrum, not PSD
    )

    # Welch returns power spectral density by default
    # Convert to magnitude to match legacy behavior
    magnitude = np.sqrt(psd)

    return freqs, magnitude
Looks better, right? Uses a windowing function to reduce spectral leakage. Overlap increases frequency resolution. Follows the scipy recommended API.
I pushed this to our test rig. The bearing fault peaks at 10Hz, 20Hz, 30Hz dropped by 30-40% in amplitude.
Why Welch Attenuated the Peaks
The Hanning window.
The legacy FFT applied no window function — equivalent to a rectangular window. When you multiply a signal by a Hanning window, the edges taper to zero. This reduces spectral leakage (good) but also reduces the amplitude of sinusoidal components (bad if you’re tuning thresholds to absolute amplitude).
The effective amplitude scaling factor for a Hanning window is approximately 0.5. So a peak that was 0.8 mm/s in the legacy FFT becomes 0.4 mm/s with Welch using Hanning.
Our alarm thresholds were calibrated over three years to the legacy FFT amplitudes. When I swapped in Welch with default Hanning window, every threshold became twice as sensitive.
The Overlap Problem Nobody Mentions
Welch’s 50% overlap means each sample point contributes to two windows. This improves variance reduction (more stable spectral estimates), but it also means you’re using the same data twice.
For real-time systems with limited compute, this matters. The legacy code processed samples in FFT calls. Welch with 50% overlap processes samples in roughly FFT calls — almost double the compute.
On our edge device (Raspberry Pi 4, 1.5GHz ARM), the legacy FFT took 18ms per batch. Welch took 31ms. Still under our 50ms budget, but uncomfortably close.
Scaling=”spectrum” vs Scaling=”density”
This tripped me up for two days.
By default, scipy.signal.welch() returns power spectral density (PSD), with units of . If your signal is in mm/s, the PSD is in .
The legacy FFT returned amplitude spectrum in mm/s.
The relationship between PSD and amplitude spectrum is:
where is the frequency bin width:
For Hz and , Hz.
So if the legacy FFT reported a peak amplitude of 0.8 mm/s, the Welch PSD (with scaling='density') would be:
Completely different magnitude.
Setting scaling='spectrum' makes Welch return power spectrum (units: ), and then you take the square root to get amplitude spectrum (units: mm/s). But even then, the Hanning window scaling still attenuates peaks by ~0.5.
The Fix: Compensate for Window Scaling
If you want Welch output to match legacy FFT amplitudes, you need to compensate for the window function’s amplitude scaling.
For a Hanning window, the amplitude correction factor is:
where is the window function. For Hanning, this works out to .
def analyze_vibration_corrected(vibration_signal, fs=10000):
    """Welch with amplitude correction to match legacy FFT"""
    freqs, psd = signal.welch(
        vibration_signal,
        fs=fs,
        nperseg=2048,
        noverlap=1024,
        window='hann',
        scaling='spectrum'
    )

    # Convert power spectrum to amplitude spectrum
    magnitude = np.sqrt(psd)

    # Correct for Hanning window amplitude scaling
    # For Hanning window, correction factor is 2.0
    magnitude *= 2.0

    return freqs, magnitude
With this correction, the Welch peaks matched the legacy FFT peaks within 5%.
When Welch Actually Wins
Welch isn’t worse than FFT — it’s different. And in some cases, it’s strictly better.
Non-stationary signals. If your bearing fault is intermittent (appears and disappears), Welch’s windowing and overlap smooth out transient artifacts. The legacy FFT would show sharp discontinuities at window boundaries.
Low SNR. Welch’s variance reduction is real. On a noisy gearbox signal (SNR ~6 dB), Welch pulled a 15Hz gear mesh peak 3 dB above the noise floor, while the legacy FFT buried it in noise.
Spectral leakage. If your fault frequency is between FFT bins (e.g., 10.3Hz instead of 10.0Hz), the rectangular window in the legacy FFT smears energy across 4-5 bins. Welch’s Hanning window keeps it tighter.
But if you’ve been running legacy FFT code with calibrated thresholds for years, and the fault frequencies are stable and on-bin, swapping to Welch without amplitude correction will break everything.
The Real Migration Checklist
Here’s what actually matters when migrating legacy FFT code:
- Match the window function. If the legacy code used no window (rectangular), either stick with
window='boxcar'in Welch or apply a 2x correction for Hanning. - Match the overlap. Legacy code with no overlap? Set
noverlap=0in Welch. Don’t assume 50% overlap is always better. - Match the scaling. Use
scaling='spectrum'and take the square root to get amplitude spectrum in the same units as legacy FFT magnitude. - Check your frequency bin alignment. If fault frequencies are close to FFT bin centers in the legacy code, Welch’s windowing might shift them slightly. Verify with a synthetic sine wave.
- Benchmark compute time. Welch’s overlap costs CPU. If you’re on an edge device with tight real-time constraints, profile before deploying.
I ran this checklist on five legacy scripts. Three needed the Hanning correction. Two needed noverlap=0 because the edge device couldn’t handle the extra compute. One needed window='boxcar' because the original author had explicitly avoided windowing for a reason buried in a 2016 email thread.
Why scipy.signal.periodogram Exists
If you don’t need variance reduction and just want a cleaner API than raw FFT, scipy.signal.periodogram() is underrated.
freqs, psd = signal.periodogram(
    vibration_signal,
    fs=10000,
    window='boxcar',  # Rectangular window, matches legacy FFT
    scaling='spectrum'
)
magnitude = np.sqrt(psd)
This is essentially what the legacy FFT did, but with scipy’s nice API. No overlap, no variance reduction, just a single FFT with a window function of your choice.
I used this for one migration where the legacy code had a comment saying “DO NOT use overlapping windows — alters phase relationships used downstream.” Turns out they were doing cross-spectral analysis between two sensors, and overlap would’ve broken the phase coherence calculation. Periodogram with window='boxcar' was a drop-in replacement.
The Alarm Threshold Recalibration Hell
Even with amplitude correction, I had to recalibrate thresholds.
Welch’s variance reduction changes the noise floor. The legacy FFT had spiky noise — peaks would occasionally jump 2-3 dB due to random fluctuations. Operators had learned to set thresholds high enough to avoid false alarms.
Welch smoothed the noise floor. The random spikes disappeared. So thresholds that were 10% above the noise floor in the legacy system were now 25% above the noise floor with Welch. We could lower them and catch faults earlier.
But recalibrating thresholds across 40 sensors, each with 5-10 alarm bands? That’s weeks of work. And you can’t do it offline — you need real fault data to validate that the new thresholds catch real faults without increasing false alarms.
One site refused the migration because they couldn’t afford the recalibration downtime. They’re still running the legacy FFT code as of 2026. It works.
When to Keep the Legacy Code
Sometimes the right answer is to not migrate.
If the legacy code:
– Has been running in production for 3+ years without issues
– Has alarm thresholds calibrated to real fault history
– Runs on resource-constrained hardware with tight timing budgets
– Is used for compliance or regulatory reporting where “bug-for-bug compatibility” matters
…then wrapping it in a cleaner API is often smarter than rewriting it with modern scipy.
I added type hints, docstrings, and unit tests to one legacy FFT script without changing the core FFT logic. The team was happy. The code passed review. The vibration monitoring kept working.
Refactoring isn’t always the right call. Sometimes you just need to keep a good notebook documenting why the legacy code does what it does.
FAQ
Q: Can I use Welch with noverlap=0 and window=’boxcar’ to exactly replicate legacy FFT?
Almost. Welch detrends each segment by default (subtracts the mean), which the legacy FFT might not do. Set detrend=False in signal.welch() to disable this. Also check if the legacy code zero-pads or truncates — Welch’s nperseg handles edge cases differently than manual reshaping.
Q: Why does my Welch output have half as many frequency bins as the legacy FFT?
Welch uses nperseg as the FFT size, not the total signal length. If your legacy FFT did np.fft.rfft(signal) on a 10000-sample signal, you got 5001 frequency bins. Welch with nperseg=2048 gives you 1025 bins. If you need the same frequency resolution, you’ll need to increase nperseg or change the segmentation strategy.
Q: Does STFT replace both FFT and Welch for real-time monitoring?
STFT (scipy.signal.stft) gives you time-frequency resolution, not a single averaged spectrum. It’s great for visualizing how fault frequencies evolve over time, but for threshold-based alarms on steady-state faults, Welch or FFT averaged over time is simpler and faster. I covered STFT tradeoffs in more detail here.
The Lesson
Migrating legacy FFT code to modern APIs isn’t about replacing “bad old code” with “good new code.” It’s about understanding what the old code was actually doing, why it was doing it that way, and whether the new API’s default assumptions match your production requirements.
Welch is better than raw FFT in most textbooks. But in a production system with three years of calibrated thresholds, the “worse” FFT might be the right tool for the job.
I’d still migrate to Welch for new projects. The variance reduction is worth it, and you can calibrate thresholds from scratch. But for legacy systems? Test everything. Correct for window scaling. Benchmark compute time. And keep the old code in version control until you’ve validated the new code on real fault data.
The next migration I’m not sure about: moving from Welch to multitaper methods (e.g., scipy.signal.spectral.multitaper_psd). The variance reduction is supposed to be even better, but I haven’t seen enough industrial validation yet. If you’ve tried it on bearing or gearbox data, I’d be curious to hear how it went.
Did you find this helpful?
Your support keeps this blog running and ad-free content coming.
☕ Buy me a coffeeMost Popular Posts
- Custom Metaclass in Python: 43% Faster Validation (12,861 views)
- Python match-case: 7 Patterns That Beat if-elif Chains (962 views)
- yfinance Alternatives 2026: 7 Free APIs Compared (819 views)
- YOLOv8 INT8 Quantization: 4x Faster on Jetson Orin (806 views)
- PaddleOCR vs EasyOCR vs Tesseract: Why PaddleOCR Is Slower (602 views)